This page shows how to get started with DHIS2 Climate Tools by running its interactive Jupyter notebook guides and end-to-end example workflows.
Specifically we describe how to run the notebooks using the JupyterLab interface, but it’s also possible to use any preferred tool such as the VSCode Jupyter notebook extension.
If you have not already downloaded the DHIS2 Climate Tools toolkit or setup the provided Python environment, first follow our installation guide. This also includes the Jupyter package needed to follow the steps described next.
Start the Jupyter Server
Start the Jupyter server at the root of the downloaded repository folder, which will give you an overview of the folder contents:
cd path/to/local/repo
jupyter labNote: It’s important that you activate the climate-tools environment from the previous installation step before you run jupyter lab. This will ensure that Jupyter uses the correct Python version with all the necessary dependencies installed.
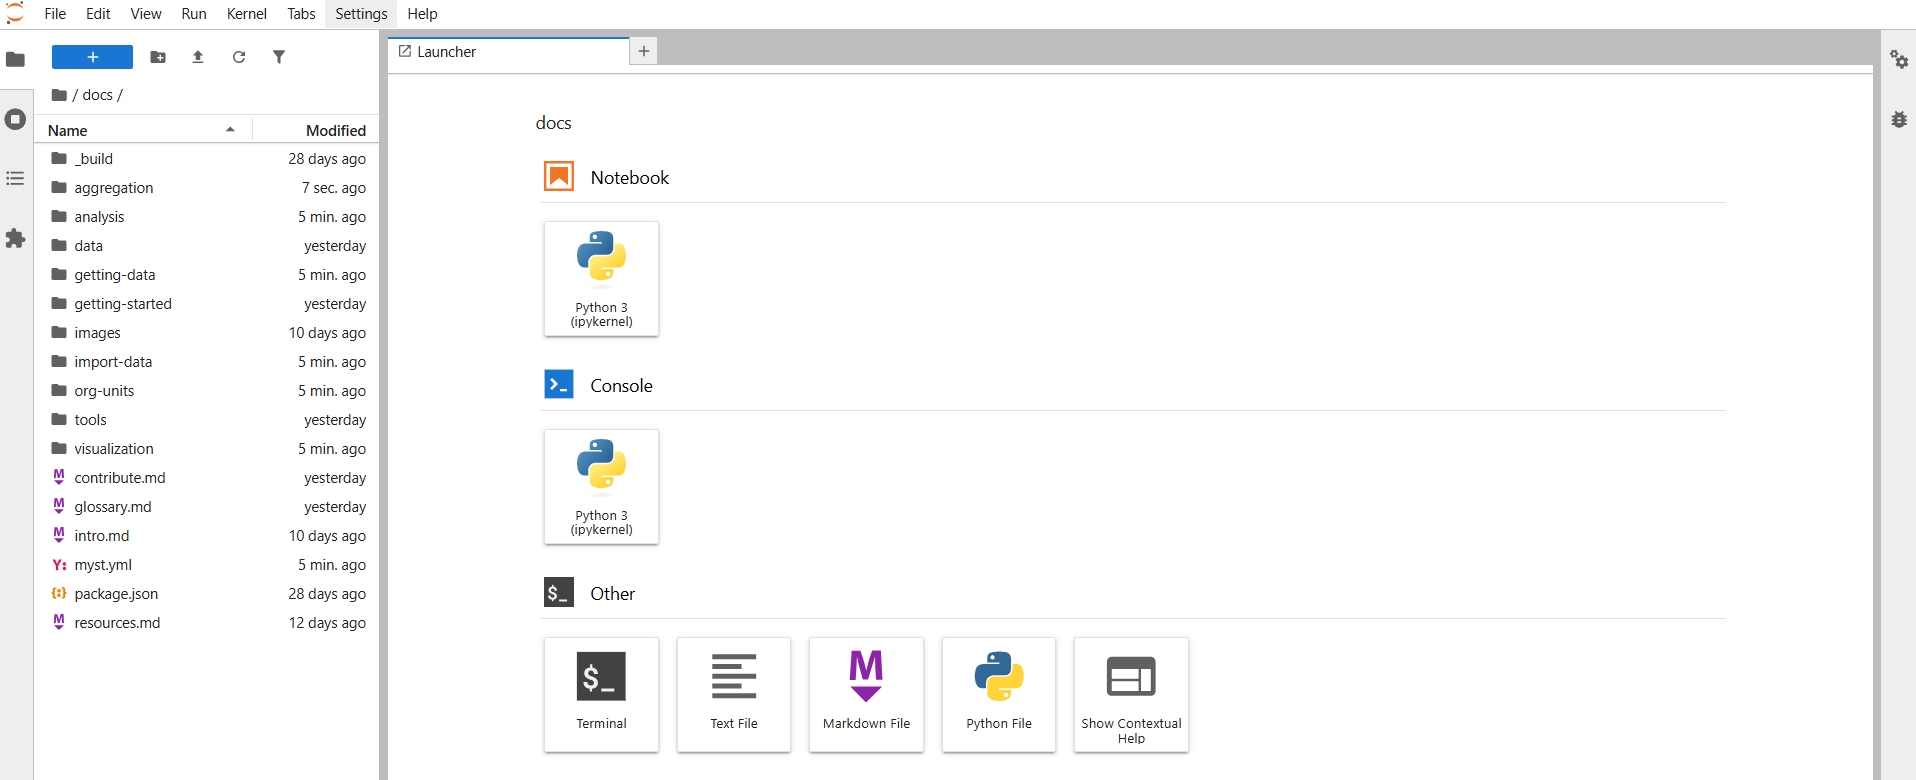
Browse the Notebooks
Visit http://
In the left-hand menu, browse the docs folder and look for files with .ipynb extensions:
Open and run a notebook
For instance, if you navigate to the docs/guides/aggregation folder you’ll find the org-unit-aggregation.ipynb file:
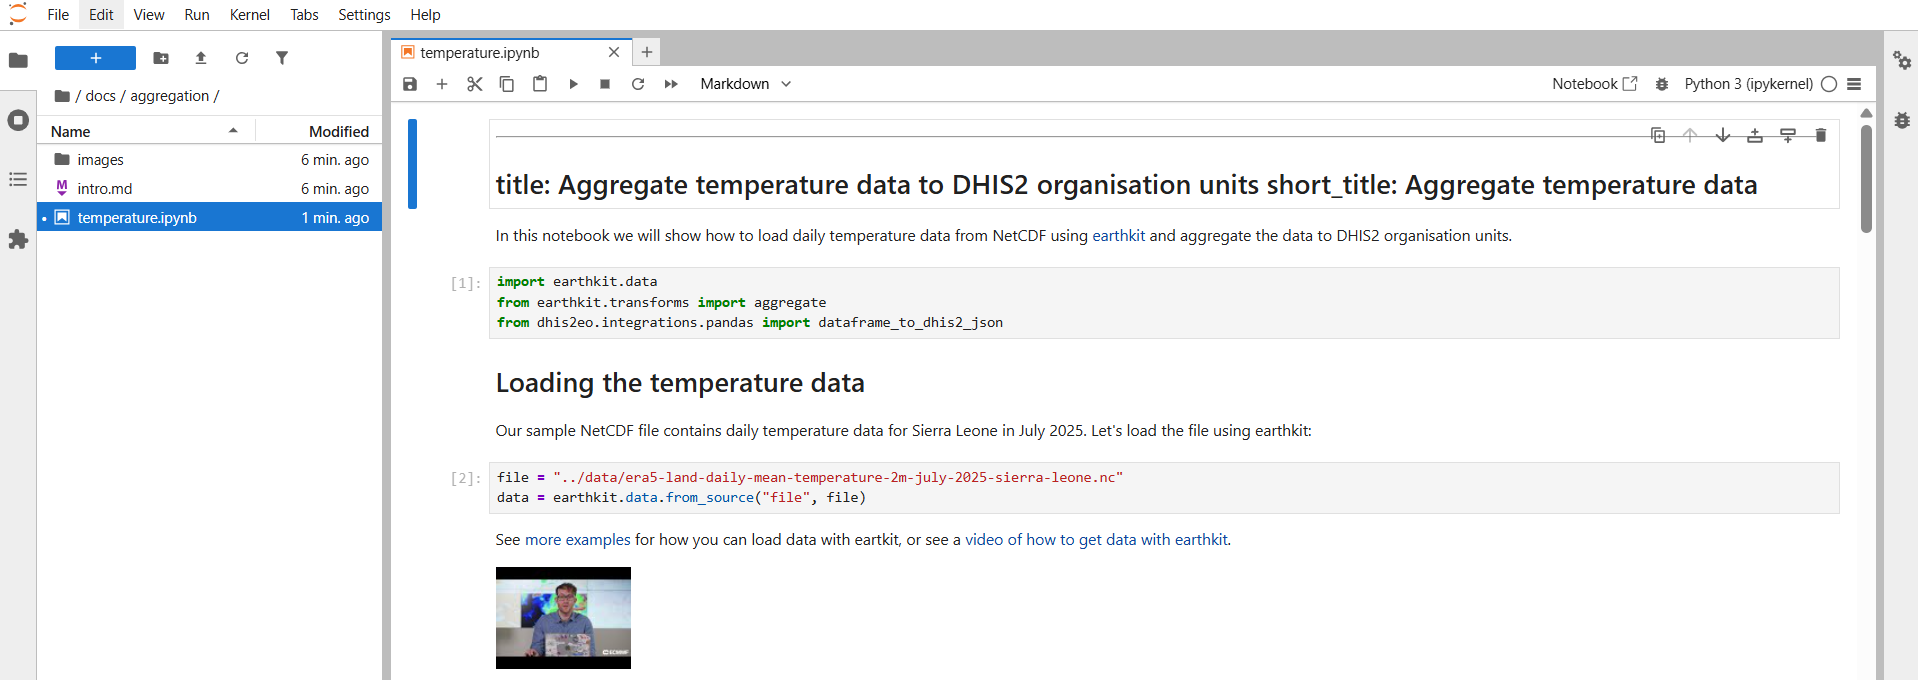
We recommend running the notebook step by step, which you can do by clicking each individual code cell and pressing control-enter to run it. Then you’ll see the results of each code cell as you go through the document.
Next steps
In this tutorial we have shown how to get started with the notebooks already provided in the DHIS2 Climate Tools repository.
You can also create your own notebooks for exploring data or executing common workflows. We aim to gather a collection of user-contributed notebooks for useful climate and health workflows:
Visit the How to Contribute page for help on how to contribute your notebooks.
For more information on how to use Jupyter Notebooks you can check out this tutorial: